Tuesday, April 10, 2012

Grapefruit salsa

Tilapia is basically the only fish I ever make around here, for several reasons. 1) It's really mild-tasting (not very fishy at all) 2) I can buy it for about $3/lb (waaaay cheaper than shrimp and fancy fishes) 3) It comes boneless and skinless and 4) It's low-fat. Win, win, win, win. Also it cooks really quickly. Add a fifth win.

In looking for a new way to dress it up, I stumbled on a recipe for grapefruit salsa on salmon, and it got the old wheels turning. I had a grapefruit in the fridge just begging to be put in a delicious salsa. So I married it with tilapia (and Isaac ate the leftovers with chips). That was a great day.

So here goes. I combined several different recipes, so no one gets credit for this one.
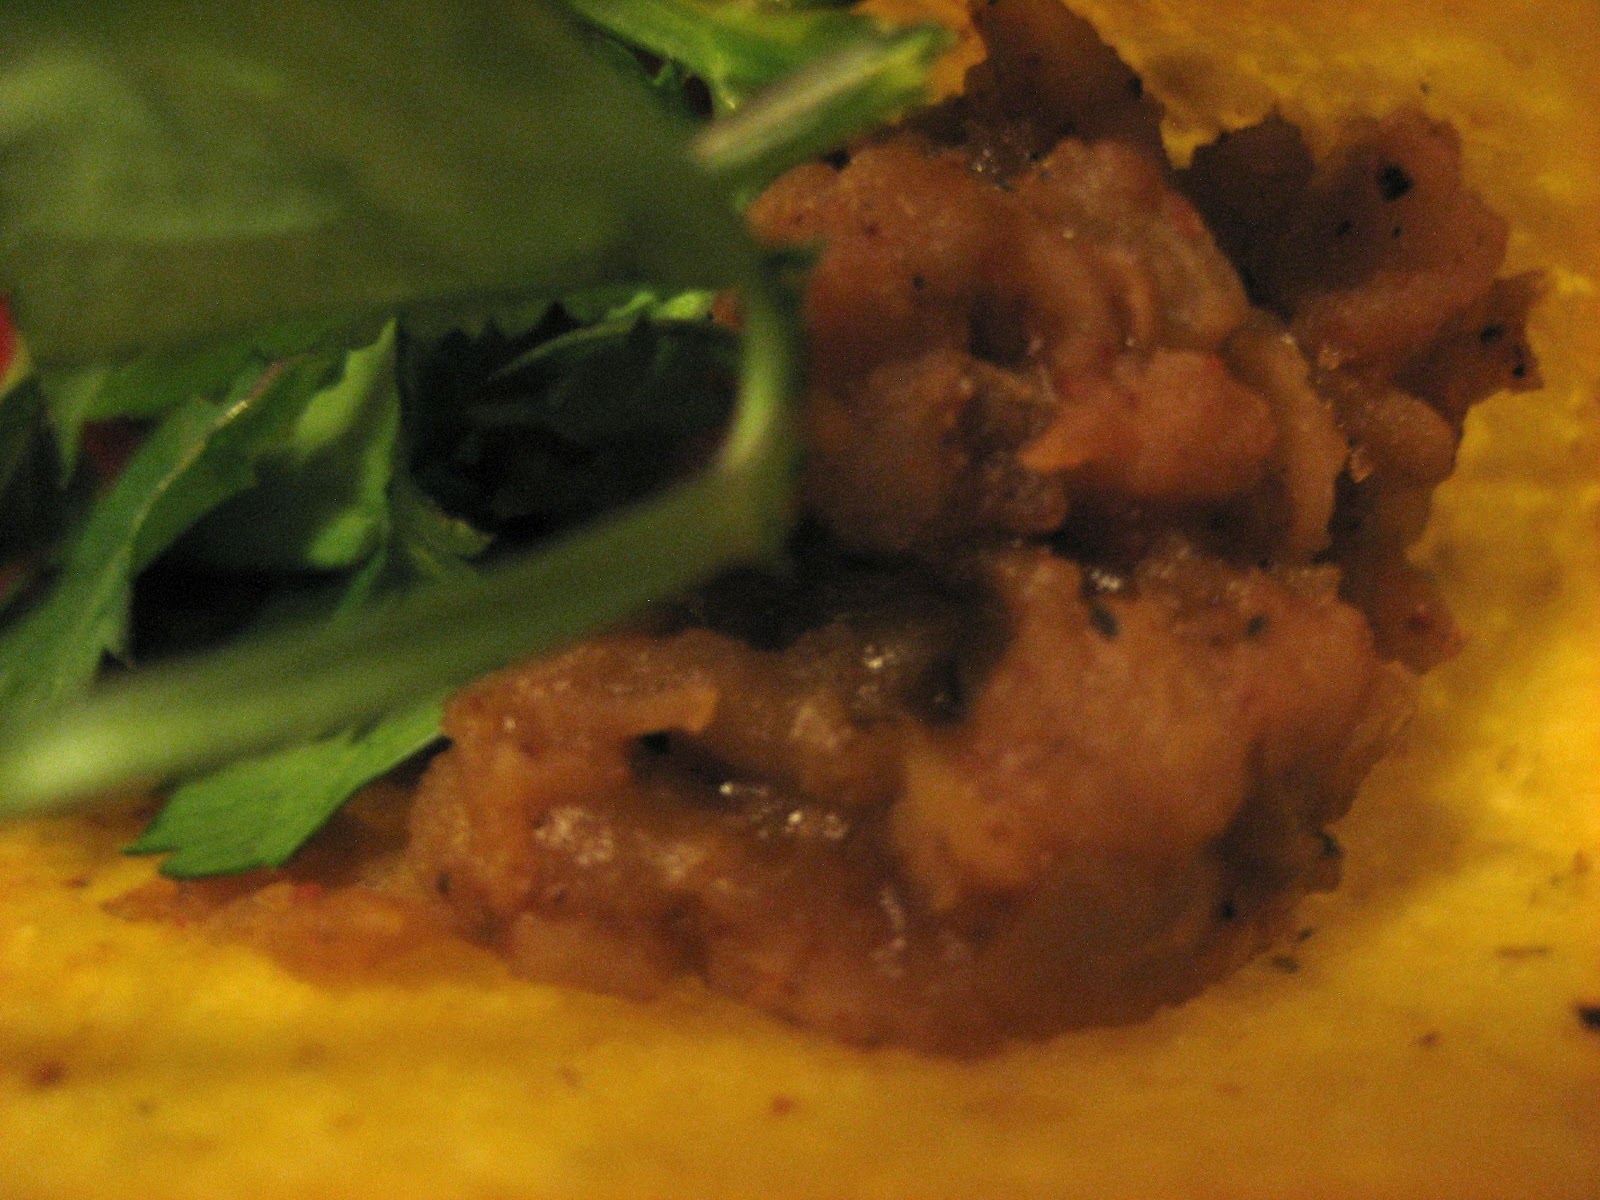

Grapefruit salsa 
(great on chicken, fish, or eaten with chips)

Shown here on top of tilapia. Mmmmm.

1 red grapefruit, peeled and segmented*
1/2 to 1 whole jalapeƱo pepper, seeded and finely chopped
1/3 cup canned pineapple tidbits, drained (fresh pineapple would be great too)
1 T. green onion, chopped
1 T. chopped cilantro (or to taste)
2 tsp. lime juice
salt to taste
sugar to taste

Chop the grapefruit segments into small pieces. Combine everything in a small bowl and add salt and sugar to taste (you may not need the sugar--it depends on how bitter and sour your grapefruit is). Cover and refrigerate at least half an hour.

Unsure how to segment a grapefruit? No worries, I just learned how to do it recently and it's SO COOL! Here's video that explains everything. You'll love it.


Tuesday, April 3, 2012

Chocolate Chip Cookies

Why can't I stop looking for new way to ingest chocolate chips? They may be one of my favorite foods. I am constantly on this quest to find new ways to bake with them that minimize the guilt afterwards. 

So here's yet another. I made probably three batches of these in rapid succession because we'd no sooner finish one than I'd crave another. They are surprisingly soft and chewy and come together really quickly. Plus they are bite-sized and adorable. Oh, I want another one! This is making me hungry...

Chocolate Chip Cookies


Ingredients:
1/3 C. unsweetened applesauce
1/3 C. light brown sugar
1 tsp. vanilla
1/4 C. milk or non-dairy milk
1 C. whole-wheat pastry flour
1 tsp. baking powder
1/4 tsp. salt
1 T. cornstarch
1/2-3/4 C. chocolate chips

Preheat oven to 350 degrees. Combine applesauce, sugar, vanilla, and milk in a large bowl. In a small bowl, whisk flour, baking powder, salt, and cornstarch. Add the dry ingredients to the wet ones and stir until about halfway, combined, then add the chocolate chips. Continue stirring just until combined.

Drop by spoonfuls onto a greased cookie sheet and bake for 7-10 minutes or just until they hold their shape when very lightly touched. Do not over bake. But don't under bake either.

Yield: About 20 cookies

Tuesday, March 27, 2012

Presto turkey pesto crepes

A while ago I went to a crepe place with the gals in Isaac's family for a girls' night out, and ate some of the most decadent, amazing crepes of my life.


It started an obsession.


So when my mom came out to visit, we decided to have a crepe night. And I made a healthier (and cheaper!) version of those amazing crepes.


Then I overate.


And then I decided to share.


Presto Turkey Pesto Crepes
Inspired by the Roll Up Cafe


Step 1: Whole Wheat Crepes


This may come as a shocker to some of you, but crepes don't have to be all that bad for you. In fact, these crepes weigh in at only 59 calories each (not including fillings!) which is even better than tortillas and way fancier feeling. Hooray!


Ingredients:
3 eggs
1/2 C. skim or almond milk
1/2 C. water
1/2 C. whole wheat pastry flour
1/4 tsp. salt


Optional: 1 T. melted butter (if you're feeling decadent. Or if you don't have a non-stick pan)


Put everything in a blender and blend until smooth. The blender is imperative! Otherwise the crepes will have little flour chunks in them that no amount of whisking will remove. Cover the batter and refrigerate for an hour.


Heat a medium skillet (8-10 inches) over medium heat and spray with non-stick spray. Pour 1/4 cup batter into the middle of the skillet, then pick it up and and gently swirl it around to spread out the batter a little more. Cook just until the top of the crepe starts to look dry, then carefully flip it over with a spatula. Cook for another 10-15 seconds or so and then remove to a cooling rack. 


Confused? If you want more help (I've had a few epic crepe disasters myself) here's an awesome video that explains it all step-by-step. Go ahead and use his recipe if you'd rather, I won't know. 


Step 2: Fill the crepes


You can fill crepes with ANYTHING. There are tons of recipes out there. I like this one because it's really easy and relatively healthy, and can be adapted to individual tastes. 


Ingredients (per crepe):

  • 2-3 slices thinly sliced deli turkey (or thinly sliced turkey breast from Thanksgiving. But the deli turkey is easier to manage)
  • 1-2 T. shredded mozzarella cheese
  • 1 T. cranberry sauce (we used the whole-berry kind but the jellied kind is fine)
  • Small handful baby spinach leaves (careful, your crepe will fall apart if you add too many)--at this point, you can roll up your crepe
  • 1 tsp. light margarine (to spread on the outside of the rolled-up crepe prior to cooking)
  • 1/2 T. - 1 T. prepared pesto sauce (I find it in the spaghetti aisle at Walmart for about $3. Keep it in the freezer--it will last forever there). Add this to the top of your crepe when you have grilled or fried (and by fried I mean heated in a skillet) it.

My finished and cooled stack o' crepes. 

Turkey, cranberry sauce, shredded mozzarella cheese, and spinach leaves.

Roll it up and spread with a thin layer of light butter if you want.

Cook in a panini grill (yeah, right, does anyone even own one?) or George Foreman grill (what we used) or  just fry it on the stove with non-stick spray until lightly browned on both sides and the cheese is melted.
Step 3: 

Eat. 

Friday, March 9, 2012

Cranberry Orange Muffins

I freely admit that I am a little obsessed with muffins. And am constantly looking for new flavors. These muffins have no added fat (except the flaxseed) and are whole grain, but still are moist and flavorful. Keep in mind, though, that healthier muffins are denser and more substantial than Costco muffins. These aren't meant to be light & fluffy, but they are delicious. 


Cranberry Orange Muffins
Adapted from Happy Herbivore and Vegetarian Family Cookbook


2 C. whole wheat pastry flour
2 T. ground flaxseed
2 tsp. baking powder
1 tsp. baking soda
1/2 tsp. salt
1/3 C. sugar
Grated zest of 1 orange
1 1/3 C. unsweetened applesauce
3-4 T. orange juice
1/3 C. dried cranberries, chopped


Preheat oven to 350 degrees. Grease or line 12 muffin tins.


Placed cranberries in a small bowl. Pour 1/4 C. very hot water over; set aside.


In a large bowl combine flour, flaxseed, baking powder, baking soda, salt, sugar, and orange zest. 


Drain cranberries and add along with applesauce and enough orange juice to make a thick but not stiff batter. Stir just until combined. Divide evenly among muffin tins.


Bake for 14-16 minutes or until tests done with a toothpick. 


Wednesday, February 22, 2012

No-meat taco filling

I've tried a few different kinds of meatless tacos, some of which I've posted on this blog in the past. But I wanted something that felt more like traditional tacos. I've tried chickpeas, and those suckers fall right out of the shell! Refried beans are too...sticky? 

Finally I hit on red lentils--they soften up and get almost mushy, but not as mushy as refried beans, and have I think less strong lentil flavor than green lentils, although you can certainly use those as well. Anyway, I loved these! I recommend using the homemade taco seasoning, but if the ingredient list overwhelms you, feel free to use a mix. 

Enjoy eating something cheap, low-fat, high-fiber, nutritious, and soooo edible!

Delicious Meatless Tacos


Ingredients:
1 small onion, chopped
1-2 cloves garlic, minced
1 cup red lentils, rinsed (you can also use green, just cook for longer)
2 1/2 cups water
1 T. soy sauce
2 tsp. lime juice (or lemon)
2-3 T. taco seasoning OR seasoning blend below
Salt & Pepper
Hot Sauce (Tapatio, Tabasco, Sriracha, Louisiana-style, whatever you've got)

Instructions:
In a medium saucepan, saute onion in nonstick spray or a thin layer of water until translucent. Add remaining ingredients except salt, pepper, and hot sauce, and bring to a boil. Reduce heat to medium and cover, boiling until water is absorbed and lentils are soft--about 20-25 minutes for red lentils, and 35-45 minutes for green lentils. 

Add salt & pepper to taste (I made the homemade taco seasoning, which is pretty salty, so I didn't add extra salt or pepper), and add hot sauce to taste.

Serve in toasted taco shells with tomatoes, salsa, cilantro, lettuce, and cheese if desired.

Taco seasoning blend:
1 T. chili powder
1 1/2 tsp. ground cumin
3/4 tsp. salt
1 tsp. pepper
1/2 tsp. paprika
1/4 tsp. garlic powder
1/4 tsp. onion powder
1/8 tsp. cayenne powder
1/4 tsp. oregano

Wednesday, February 15, 2012

Making Kale Edible

Kale was on sale a while ago and I thought it was time to branch out a little. Kale is supposed to be one of the healthiest greens out there and I tend to stay in my spinach/romaine rut. 


I bought some kale.


Then I tried eating it. First attempt was in a green smoothie. I make these all the time for breakfast and thought I'd just substitute kale for the spinach. 


FAIL!


In a salad? EPIC FAIL!


I still had a lot of kale left. I hate throwing food away. So I tried a new recipe for sweet potato kale soup.


It was amazing. I ate every bit of that soup by myself (Isaac was out of town) and could have eaten more. Putting kale in a soup tenderizes the tough leaves and the delicious broth masks and mellows out the flavor. The sweet potatoes also help balance out the kale. 


That said, here is the recipe. This is a nutritional powerhouse and sooo edible!


African Sweet Potato & Kale Soup


1 small red onion, thinly sliced
2 cups vegetable or chicken broth
2 cups peeled and diced sweet potatoes (about 3/4" cube. ish.)
2 tsp. chili powder
1 tsp. ground cumin
1 tsp. granulated garlic powder
1/4 tsp. red pepper flakes (optional)
1 tsp. mild curry powder
1 T. yellow miso paste* (see below for explanation)
1/4 tsp. cinnamon

Cook onion in a medium soup pot in a thin layer of water or in non-stick cooking spray until translucent. Add broth, yams, and 3/4 C. water and bring to a boil.

Once boiling, reduce heat to medium and cook until yams are almost tender, about 3-5 minutes.

Add kale and remaining ingredients. Continue to cook, stirring frequently, until kale is dark green and soft, about 3 minutes more.

Set aside for 5-10 minutes, allowing flavors to merge, then serve.

*A word on miso paste: Miso paste can be found in the refrigerator section of ethnic foods stores and most whole foods stores, and maybe even in a really well-stocked supermarket. That said, if you don't want to buy it or can't find it, some possible substitutions are soy sauce or tahini (preferably half & half), or if you can find some powdered miso soup (Knorr apparently makes it), you can use the powdered soup mix to replace the miso paste. None of these are as good as the real thing (miso has kind of a unique but delicious flavor) but how many recipes out there really use the stuff? I used real miso though, and it was AMAZING.

Thursday, February 9, 2012

Mexican Quinoa and Stuffed Peppers

I'm branching out, folks. Isaac made me promise never to make him stuffed peppers, but that doesn't stop me from making them for me when he's out of town.


I found this great recipe for Mexican-style quinoa and loved it and decided to stuff some bell peppers with it. It was tasty, low-calorie, nutrition-packed, and oozing with awesomeness. 


Be forewarned that the ingredient list is a little daunting. Most of the ingredients are ones you're likely to have in your pantry, and once you combine everything it's actually a very quick recipe. So don't panic.


Also, this quinoa is delicious eaten on its own, or in tacos, burritos, on taco salad, or mixed in with scrambled eggs for a protein-packed breakfast. Mmmm...


Quinoa (pronounced KEEN-wah), by the way, is a rock-star grain that you can find in small boxes in the grocery store (usually near the rice & beans and sometimes in the baking aisle by the flour) but the best place to buy it is in a store that sells things in bulk, where it will be much cheaper. It's one of the few grains that gives you a complete protein, and is high in fiber, magnesium, and iron, and is also gluten-free, for our celiac friends. Told you. Rock star.


Mexican Quinoa
Source: Happy Herbivore Cookbook


1 T. red wine vinegar (use rice or cider vinegar if you don't have the red wine vinegar)
2 T. soy sauce
1 tsp. garlic powder
1 1/4 tsp. onion powder
1 tsp. paprika
1 tsp. oregano or marjoram
1tsp. ground cumin
1 T. chili powder
dash or two of ground cinnamon
3. T. ketchup
1 T. prepared yellow mustard
-----------------------
1 C. quinoa, rinsed
1/8 tsp. liquid smoke, optional
hot sauce, to taste
salt & pepper, to taste (I didn't think it needed any)

Whisk 2 cups of water with all the ingredients except the last 4 (or everything above the dashed line--I made it easy for you) in a medium pot until well-combined. Add the quinoa, cover, and bring to a boil. Once boiling, reduce heat to medium and continue to cook, stirring occasionally, until all the water is absorbed (about 10-20 minutes). Add liquid smoke, hot sauce, and salt & pepper if desired. 

For even better results, allow to sit for about half an hour before eating to let the flavors blend. Eat plain or in stuffed peppers or above listed ideas. Enjoy!

Quinoa-Stuffed Peppers for 2

I used green peppers because, well, they are the cheapest.
These would be best with red or yellow peppers, but green was still good.

2 large peppers, tops and seeds removed (your choice of color)
1 1/2 cups Mexican quinoa (above)
1/2 cup frozen corn, thawed
1/2 cup black beans, drained and rinsed
1-2 green onions, chopped (white & green parts)
2 T. chopped cilantro
1/2 cup salsa
1/4 cup ketchup
shredded cheese, if desired

Preheat oven to 350 degrees.

Mix quinoa, corn, beans, onions, and cilantro in a medium bowl; set aside. 

To prepare the peppers, cut a very thin slice from the bottom of the peppers to help them stand up straight. Place them in a pot along with about 1/2 inch of water, cover, and bring to a boil. Steam for about 3-4 minutes, or until softened slightly. Remove with tongs and place in a loaf pan. 

Divide the quinoa mixture evenly between the two pepper shells. Mix salsa ketchup and spoon over the top (alternatively you could just use plain salsa). Sprinkle with shredded cheese, if desired. Cover peppers with foil and place in heated oven for about 25 minutes, removed foil, and continue baking another 5-10 minutes, or until heated through and cheese is melted. 

Remove from oven, let sit for a few minutes to cool, and enjoy! 

Thursday, February 2, 2012

Blender Waffles

We have a new favorite waffle.

Forget all about my previous waffle recipe. They are healthy but not nearly as delicious as these are. Maybe it's because they have a tad bit of oil and sugar?...

The beauty of these waffles is they use whole-grain wheat (like the wheat berries or kernels) without needing to have a wheat grinder. Trying to finish off some of that eternal food storage? This is a great way to do it! The key is to blend them for a LONG time for a smoother texture. If you're in a hurry, you can stop early but the waffles will be a little crunchier.

Also, you can make these into pancakes if you'd rather.

The topping on these is made from blackberries, but you can use the same technique I use for my blueberry topping to put on these. Yum!


Whole-Wheat Blender Waffles
Or Pancakes
Source: My Aunt Judy

1 cup whole-wheat kernels
1 1/2 cups milk
1 egg
2 T. oil
1 T. baking powder
1-2 T. sugar
1/2 tsp. salt

Mix wheat and 1 cup of milk in a blender. Blend for 2-3 minutes. Add remaining milk. Blend another 2-3 minutes (the wussier your blender, the longer you should blend everything). Add remaining ingredients and blend to combine.

Cook on a hot greased waffle iron or pancake griddle. Makes about 6 waffles.

Thursday, January 26, 2012

Mulligatawny Soup

We ate this soup at a church soup potluck, and Isaac downed two bowls of it without giving any other soup a second glance, then begged me to get the recipe. I did. And a new addiction was born. 


This is easy and relatively healthy for being a creamy soup, and sooooo comforting on a cold day! Plus you all know I'm obsessed with Indian food. 


We have tried this with both 1/2 and 1/2 and coconut milk, and thought each was equally delicious. Also, you can add the rice directly to the soup, serve the soup over the rice, or leave the rice out completely. I've tried all three options and all are great.


Mulligatawny Soup
Source: Rachel Harding

1 tablespoon olive oil
½ onion, chopped
1 1/2 cups chopped carrots (about 3-4) large carrots, peeled
1 to 1 1/2 cups thinly chopped celery (about 3-4 stalks)
¼ cup all-purpose flour
2 tablespoons curry powder or 1 tablespoon hot curry powder
6 cups low-sodium chicken broth
½ Granny Smith or other tart apple, cored, peeled and chopped
2 cups cooked rice, white or brown (optional)
2 cups cooked, diced chicken, about 2 chicken breasts (you can substitute lentils or garbanzo beans for a cheaper vegetarian option)
1 teaspoon salt
¼ teaspoon dried thyme 
½ teaspoon black pepper
¾ cup half & half or coconut milk

In a large pot, heat the oil over medium heat until hot. Add the onion, carrots and celery, and cook, stirring often, until they are slightly softened, about 3-4 minutes. 

Stir in the flour and curry and cook for one minute, stirring constantly. Slowly whisk in the broth until well combined and bring the soup to a simmer. 

Cook at a low simmer, stirring occasionally, for 8-10 minutes. 

Add the chopped apple, rice, chicken, salt, thyme, and pepper. Simmer 8-10 minutes longer, stirring every now and then to prevent sticking, until the vegetables are tender. 

Add the half & half, warm the soup through, and serve.

Sunday, December 18, 2011

Tip: Whole-wheat pastry flour

I am all about whole grains, even when I'm baking. But I have found a way to sneak in the whole grains without turning muffins into my next doorstop. In fact, it's sometimes hard to tell there's even whole grains in there at all.

The secret? Whole-wheat pastry flour.

What is whole-wheat pastry flour, you ask? Let me tell you. It is whole-grain flour that is ground usually from soft white wheat into very fine flour. It has a lower protein content than regular bread flour, so it makes for softer baked goods.

There are a few ways you can secure this gem of baking success for yourself:

1) Just buy it. Lots of stores sell it in their baking aisles--look for Bob's Red Mill or other brands. You can also buy it in bulk in almost any health food store, or find it online.

2) Grind it--if you have a grinder, or maybe your neighbor. Look for white spring wheat, because this will give your flour milder flavor and softer texture. Wheat grinders can usually let you decide how fine of flour you want to grind, and for this you want the finest setting available. I often will toss some brown rice in with my flour while it's grinding, to further lower the gluten content and make baked goods even softer. Don't use more than about 1:3 or 1:4 ratio, though, or your cookies and muffins might start to get a little crumbly.

3) If you can't find whole-wheat pastry flour and don't have a wheat grinder, you can also buy some brown rice or oat flour and mix it in with your whole wheat flour. I highly recommend looking around for  white spring wheat flour. It is lighter in color, softer in texture, and much milder in flavor than regular whole wheat flour, but is about the same nutritional value. Many people are surprised when I tell them my bread is 100% whole wheat because it looks lighter and is softer than what you expect. You can buy it online here or here or here or here.

Tuesday, December 13, 2011

Vegetable Tacos


I know it's December and all, but I made these guys back in the summertime when zucchini and corn were cheap. 

Those were the days. 

These tacos make a wonderful quick meal without using the oven and are delicious and really healthy. And no one ever said you can't have good tacos in the winter as well.

Word to the wise: the filling for these only stays good for 1-2 days (a sad surprise for us leftover fiends), so plan to eat them pretty quickly.

Photo from Trainer Momma

Vegetable Tacos
Source: Trainer Momma (with some modifications)
2 tsp olive oil
2 cups frozen corn kernels
1 large zucchini, diced
1 1/2 cups grape tomatoes, quartered (or just diced roma tomatoes if you're on a budget)
1/3 cup chopped red onion (could also use green onion)
1/4 cup fresh cilantro
2 Tb lime juice
1/2 tsp salt
refried black or pinto beans
corn tortillas (you can use flour if you'd rather)
Monterey jack cheese, shredded or queso fresco, crumbled (optional)
In a large skillet add olive oil, corn and zucchini and saute over medium-high heat for 3-5 minutes. Transfer to a large bowl.
Add tomatoes, red onion, cilantro, lime juice and salt. Mix until blended. Set aside.
Heat refried beans in microwave or stovetop until heated through. Warm corn tortillas briefly in a dry skillet until pliable. Top with 2 Tbsp. warm refried beans and 1/3 cup of the vegetable mixture. Top with cheese if desired.

Tuesday, December 6, 2011

Whole Wheat Pizza Crust

Homemade pizza pricks at my conscience a little--lots of refined carbs and lots of bad fats. Tsk tsk. My quest to make it healthier started with looking for a good whole wheat pizza crust.

I found two. And they are both good in different ways.

#1 comes from my Bosch cookbook Sensible Cooking. It calls for dough enhancer which you can buy here or here. Or you can use wheat gluten with vitamin C added. Or you can try it with nothing and it will probably still turn out fine. (Really, why pay more?) It also has no added oil, so it's quite low in fat, which is always a plus.


#1 Soft Whole Wheat Pizza dough (low-fat)
Source: Sensible Cooking
(Note: this recipe makes 2-3 pizzas)


3 C. hot tap water (not hot enough to burn--about 120-130 degrees)

2 Tbsp. honey

6-8 C. whole wheat flour (I use white spring wheat)

1 Tbsp. yeast

1 Tbsp. salt

1 Tbsp. dough enhancer (see above discussion)

For Bosch (or other bread mixer): Put water, honey and 3 C. of flour in Bosch bowl. Mix until paste consistency. Add yeast and salt. Add additional flour quickly 1 cup at a time only until mixture pulls away from sides of the bowl. You may not need to add the entire amount of flour or you may need to add a bit more. Knead 10 minutes, adding the dough enhancer the last 2 minutes of kneading. Place in bowl coated with cooking spray, turning once to coat the top. Cover and let rise for 30 minutes, then shape as desired.

By hand:

In a small bowl, combine 3 cups flour, yeast, and salt. Add water and honey; beat just until moistened. Stir in enough remaining flour to form a soft dough (dough will be slightly sticky).

Turn onto a lightly floured surface; knead until smooth and elastic, about 6-8 minutes. Place in a bowl coated with cooking spray, turning once to coat the top. Cover and let rise for 30 minutes.

#2 Savory Whole Wheat Pizza Dough
Source: Taste of Home

2 to 2-1/2 cups white whole wheat flour


1 package (1/4 ounce) quick-rise yeast

1 tablespoon dried oregano

1 teaspoon salt

1 teaspoon garlic powder

1 cup warm water (120° to 130°)

2 tablespoons olive oil


In a small bowl, combine 2 cups flour, yeast, oregano, salt and garlic powder. Add water and oil; beat just until moistened. Stir in enough remaining flour to form a soft dough (dough will be sticky).

Turn onto a lightly floured surface; knead until smooth and elastic, about 6-8 minutes. Place in a bowl coated with cooking spray, turning once to coat the top. Cover and let rise for 30 minutes.

On a floured surface, roll dough into a 15-in. circle. Transfer to a 14-in. pizza pan coated with cooking spray. Build up edges slightly. Prick dough thoroughly with a fork. Bake at 450° for 5-8 minutes or until lightly browned.

Top with desired toppings and bake 15-20 minutes longer or until cheese is melted.

Sunday, October 23, 2011

Butternut Squash Biscuits


So remember that 1/2 a butternut squash I roasted? Using half means I left half. And I wasn't about to eat it plain. So I made these as an accompaniment to Moroccan Stew and loved them! They are moist, tender, nutritious and really tasty. Their texture is like a cross between a biscuit and a muffin.


Healthy Butternut Squash Biscuits
Adapted from food.com 

Ingredients
1/3 cup canola oil 
2 cups whole wheat pastry flour 
1/2 cup quick-cooking oatmeal 
4 teaspoons baking powder 
1 teaspoon cinnamon
1/4 teaspoon allspice or 1/8 nutmeg, 1/8 cloves
1/4 teaspoon salt 
1 egg, beaten 
2-3 tablespoons brown sugar 
1 1/2 cups butternut squash, cooked and pureed 
1/3 cup walnuts or 1/3 cup pecans, chopped (optional) 

Directions


1) Preheat oven to 350°F Peel squash and cut into cubes. Place on cookie sheet which is covered with parchment paper. Sprinkle with a little nutmeg, if desired. Bake for 30 to 40 minutes until soft. Cool until you can easily handle squash. Puree. Set Aside. 


   1b) Alternatively, place cut-side down in a large bowl or glass casserole dish and add     about 1/2 inch of water to the dish. Cover with plastic wrap and microwave for 8-10 minutes, or until you can pierce it very easily with a knife. Puree in a food processor or blender.  Watch out. It's hot.

2) Preheat oven to 400°F.

3) Combine all ingredients in large bowl and mix with fork or spoon until well blended.

4) Drop by spoonfuls onto greased cookie sheet. (More like scant 1/4 cup-fulls. I got 20 biscuits from this recipes)

5) Bake for 12 - 15 minutes or until the tops don't indent when touched lightly.

Wednesday, October 19, 2011

Moroccan Stew

I was intrigued by this recipe because of its interesting blend of spices. Cinnamon? Coriander? How exciting! Also it is meatless, full of veggies, and low-fat. And cheap. Win, win, win. Win. This tasted waaaaay better the next day, after the flavors blended a little more, so give it a day if you have the time and patience. Also, I thought it was a tad bitter, so I added a little brown sugar, and also tossed in another dash or two of the cinnamon, cumin, and coriander. 


Moroccan Stew


Ingredients

  • 2 cups cauliflowerets
  • 3 medium carrots, cut into 2-inch julienned strips
  • 1 medium onion, quartered and thinly sliced
  • 2 teaspoons olive oil
  • 1 cup sliced zucchini (I used green beans. That's what I had.)
  • 1/2 cup water
  • 1 teaspoon ground cumin
  • 1/2 teaspoon salt
  • 1/2 teaspoon ground coriander
  • 1/4 teaspoon ground cinnamon
  • 1/8 teaspoon cayenne pepper
  • 1/8 teaspoon pepper
  • 1 can (15 ounces) garbanzo beans or chickpeas, rinsed and drained
  • 1 can (14-1/2 ounces) diced tomatoes, undrained
  • 1 tablespoon brown sugar, optional (my addition)
  • Additional salt and seasonings to taste (my addition)
  • Hot cooked rice, optional
  • Chopped cilantro and/or chopped roasted cashews, optional (my addition)

Directions

  • In a large nonstick skillet, saute the cauliflower, carrots and onion in oil for 10 minutes. Add the zucchini, water, cumin, salt, coriander, cinnamon, cayenne and pepper. Bring to a boil. Reduce heat; cover and simmer for 5 minutes. Stir in garbanzo beans and tomatoes; simmer 5 minutes longer. Add sugar and additional seasonings to taste, if desired. Serve over rice if desired. Garnish with cilantro and cashews if desired. 
  • Yield: 5 servings. 138 calories per serving (excluding rice and garnishes)